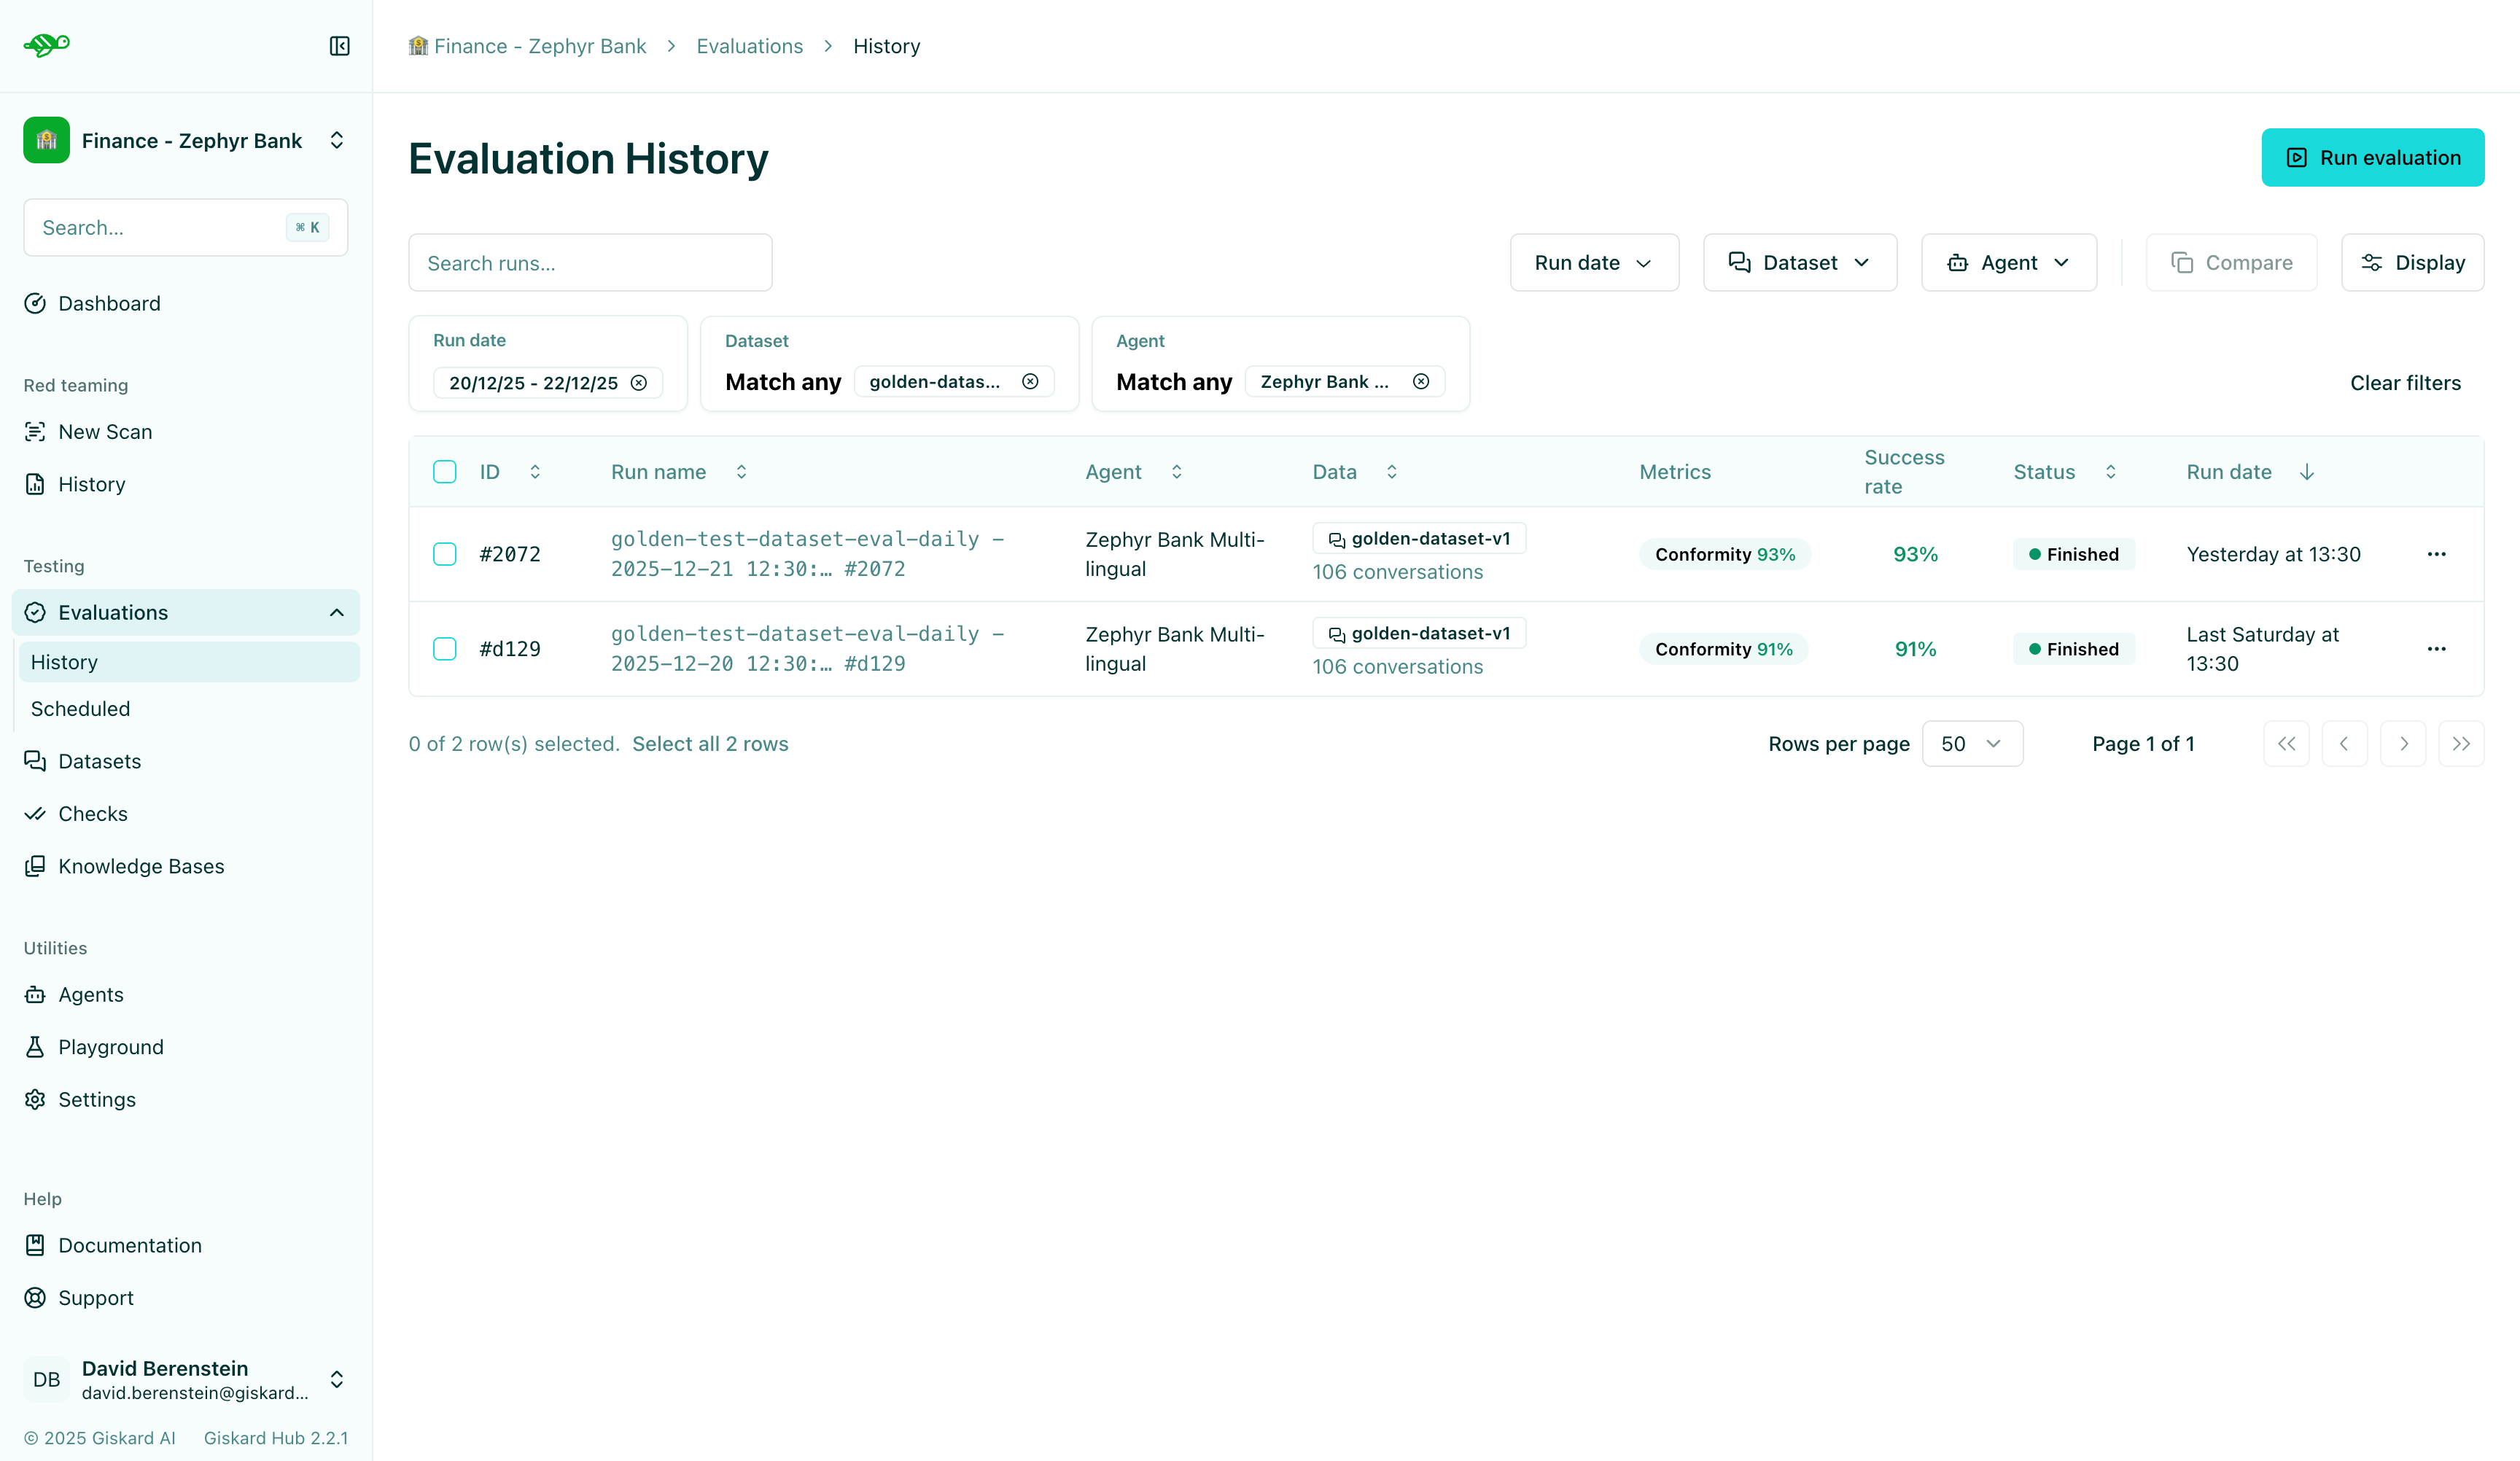
Run and review evaluations
On the Evaluations page, click on “Run evaluation” button in the upper right corner of the screen.
Configure the evaluation
Section titled “Configure the evaluation”Next, set the parameters for the evaluation:
-
Agent: Select the agent you wish to evaluate. -
Dataset: Choose the dataset you want to use for the evaluation. -
Tags(optional): Limit the evaluation to a specific subset of the dataset by applying tags.

Checks used in the evaluation
Section titled “Checks used in the evaluation”The evaluation run is automatically named and assessed against the checks (built-in and custom ones) that were enabled in each conversation. The built-in checks include:
-
Correctness: Verifies if the agent’s response matches the expected output (reference answer).
-
Conformity: Ensures the agent’s response adheres to the rules, such as “The agent must be polite.”
-
Groundedness: Ensures the agent’s response is grounded in the conversation.
-
String matching: Checks if the agent’s response contains a specific string, keyword, or sentence.
-
Metadata: Verifies the presence of specific (tool calls, user information, etc.) metadata in the agent’s response.
-
Semantic Similarity: Verifies that the agent’s response is semantically similar to the expected output.
Review evaluation results
Section titled “Review evaluation results”When you open an evaluation run, you can review the overall results before diving into individual test cases. This high-level view helps you understand the evaluation performance at a glance and identify areas that need attention.
Metrics view
Section titled “Metrics view”The metrics view displays performance statistics for each check that was used in the evaluation. This view is particularly useful when you have custom checks, as it allows you to see how each check performed across all test cases.
The pie chart below displays the number of evaluations that passed, failed, or were unexecuted.
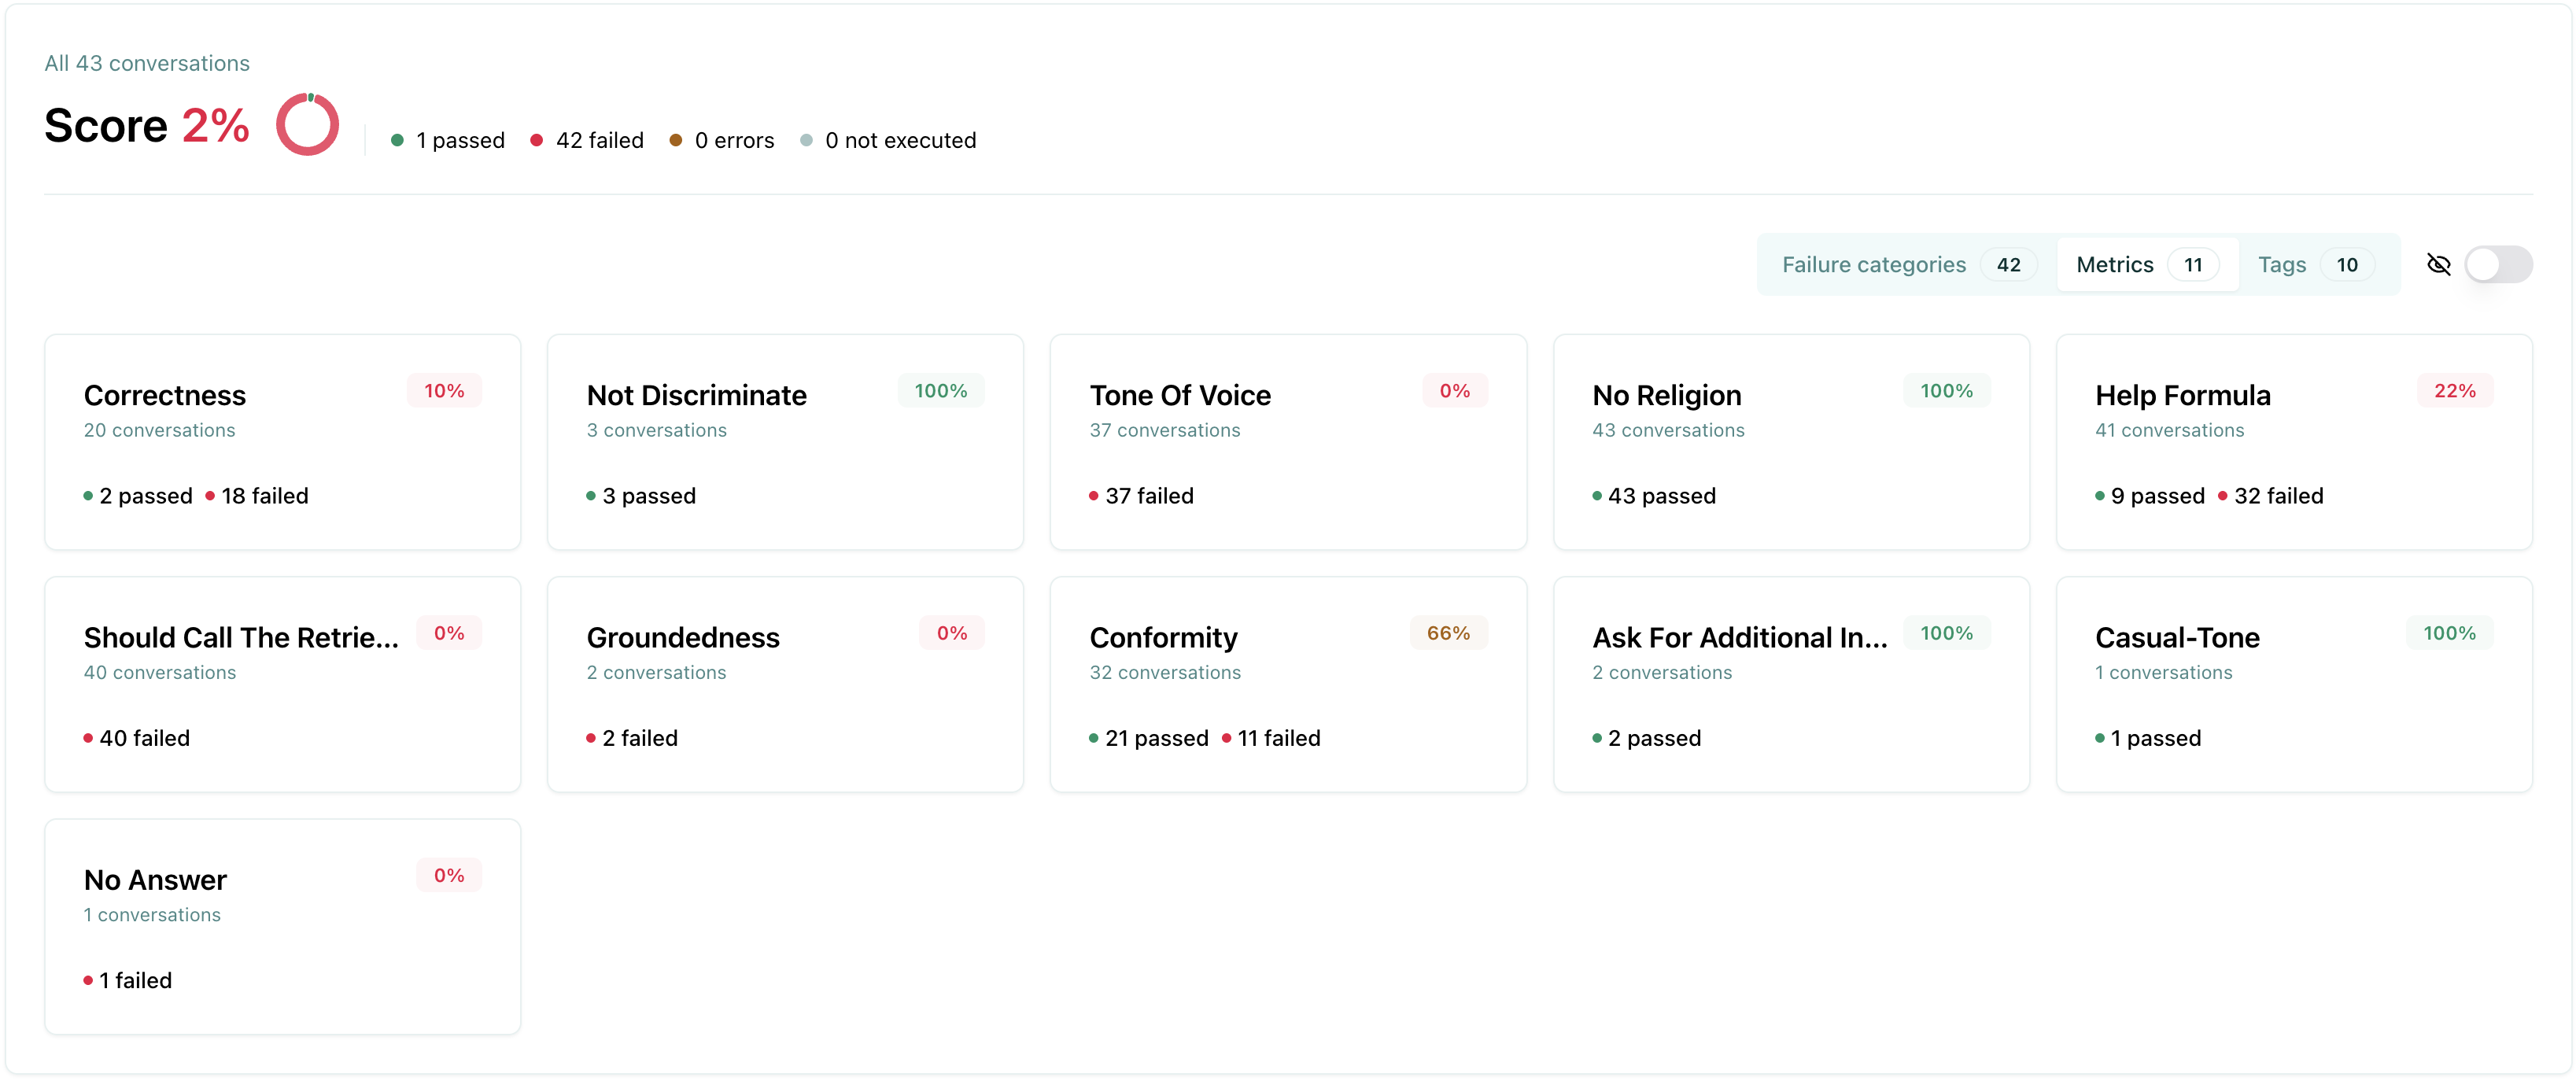
The metrics view helps you:
- Identify which checks have the highest failure rates
- Understand which custom checks are most effective
- Prioritize which checks need refinement or adjustment
Failure category view
Section titled “Failure category view”The failure categories view groups test failures by their failure category. This view is useful to understand the root cause of your failures and identify patterns in how your agent is failing. You can also manually update the failure category to a different one.
The pie chart below displays the number of evaluations that passed, failed, or were unexecuted.
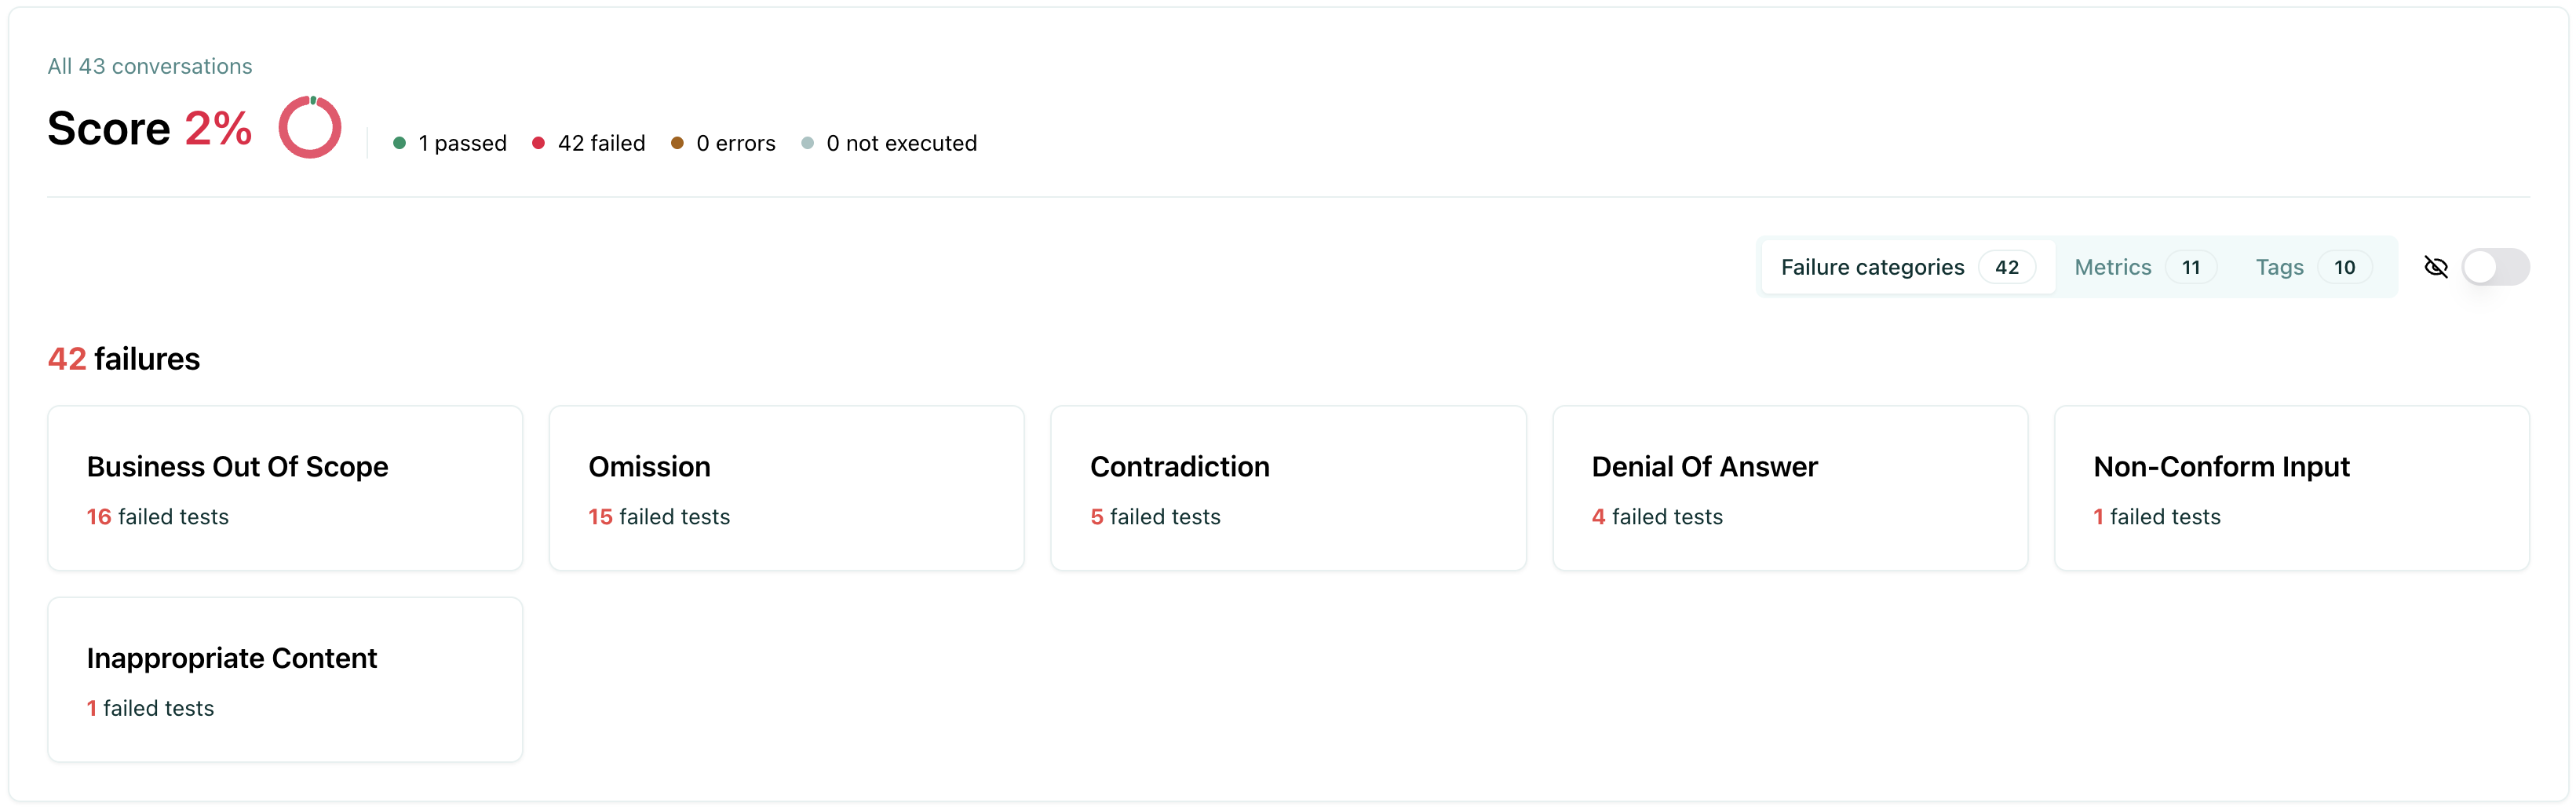
Using failure categories helps you:
- Identify patterns - See which types of failures are most common
- Prioritize fixes - Focus on the most critical failure types first
- Assign tasks - Route issues to the right team members based on category
- Track improvements - Monitor how failure rates change over time
Tags view
Section titled “Tags view”The tags view helps you filter and analyze results by custom tags.
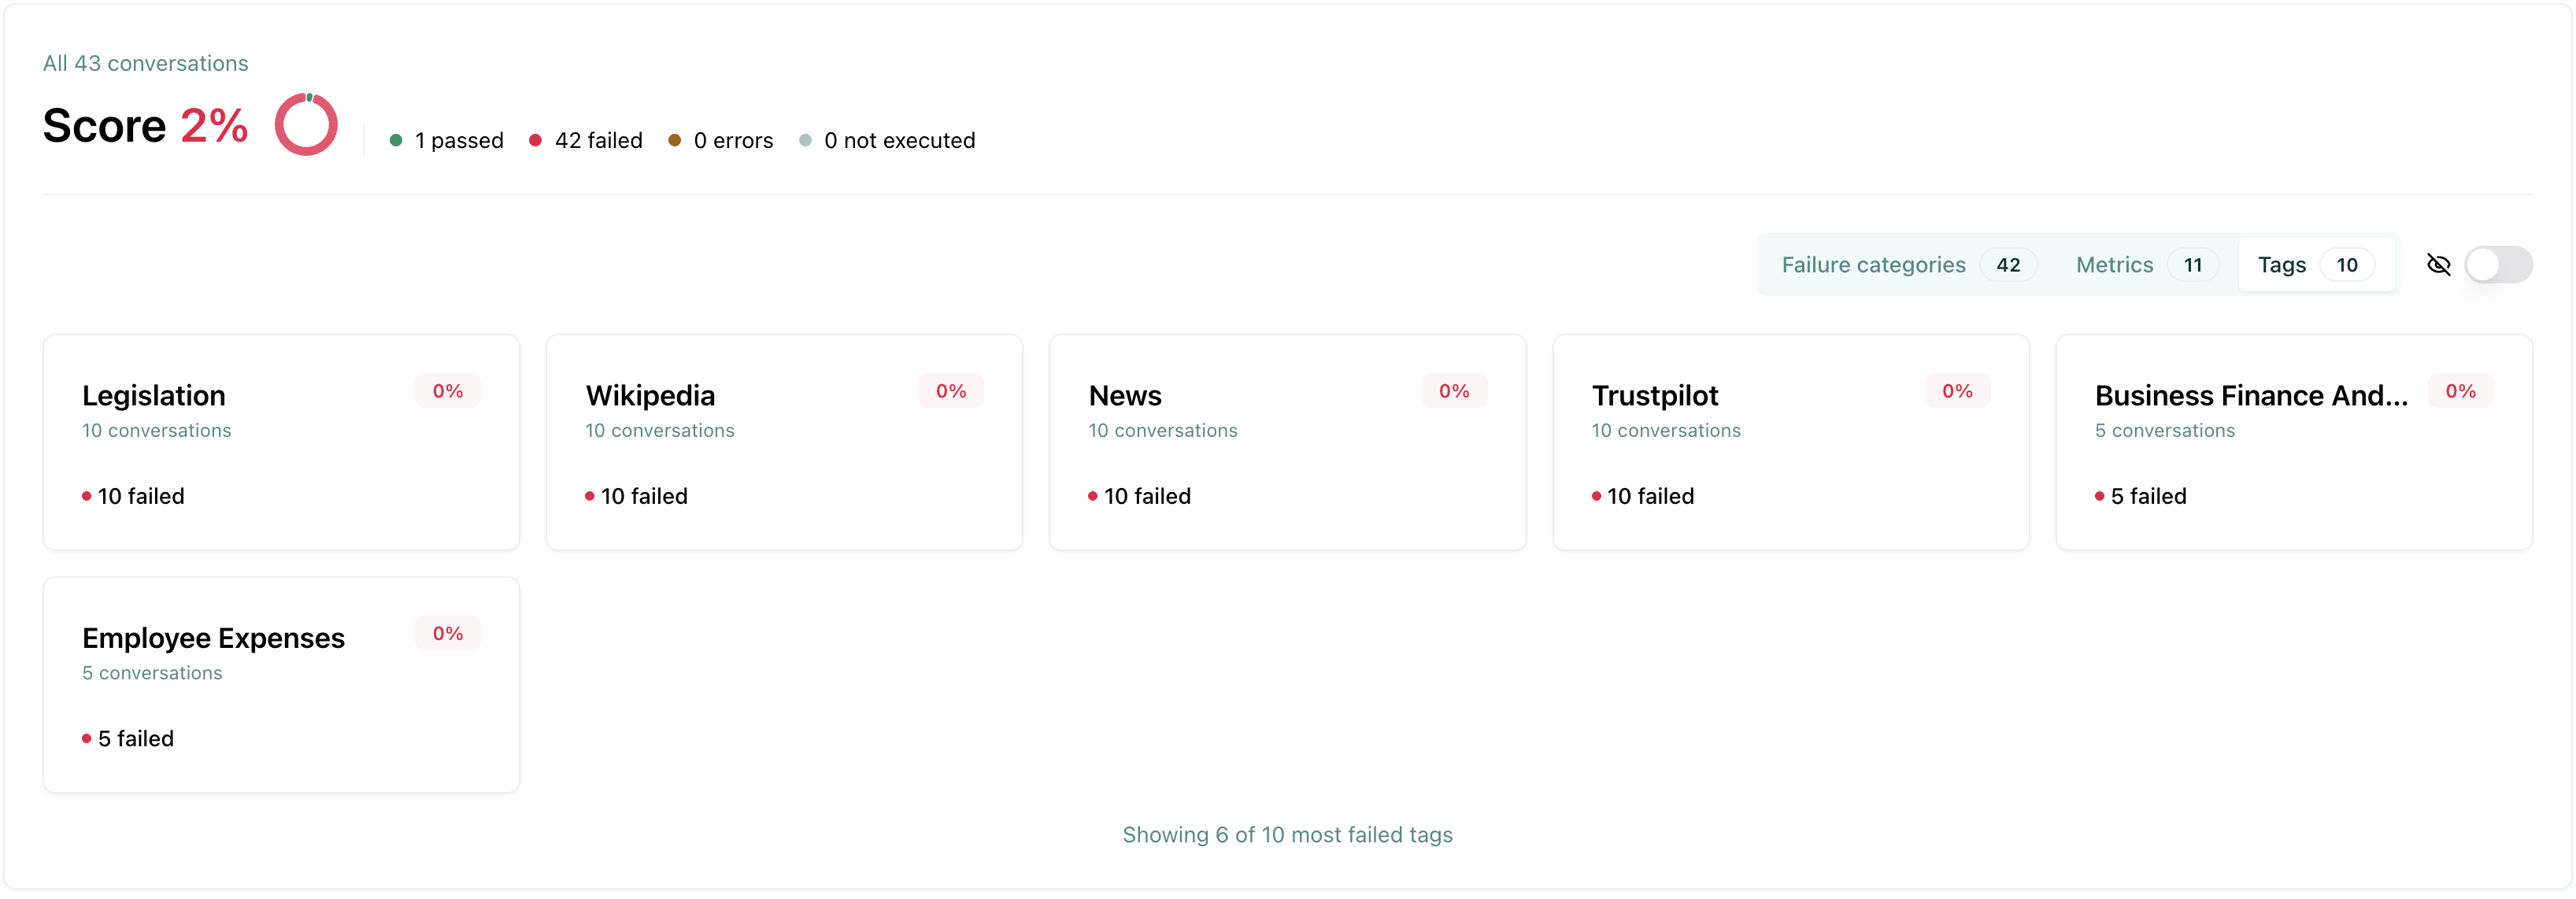
Using tags helps you:
- Filter results - Focus on specific test types or scenarios
- Compare performance - See how your agent performs across different test categories
- Identify weak areas - Discover which types of tests have higher failure rates
- Organize reviews - Review test results by category or domain
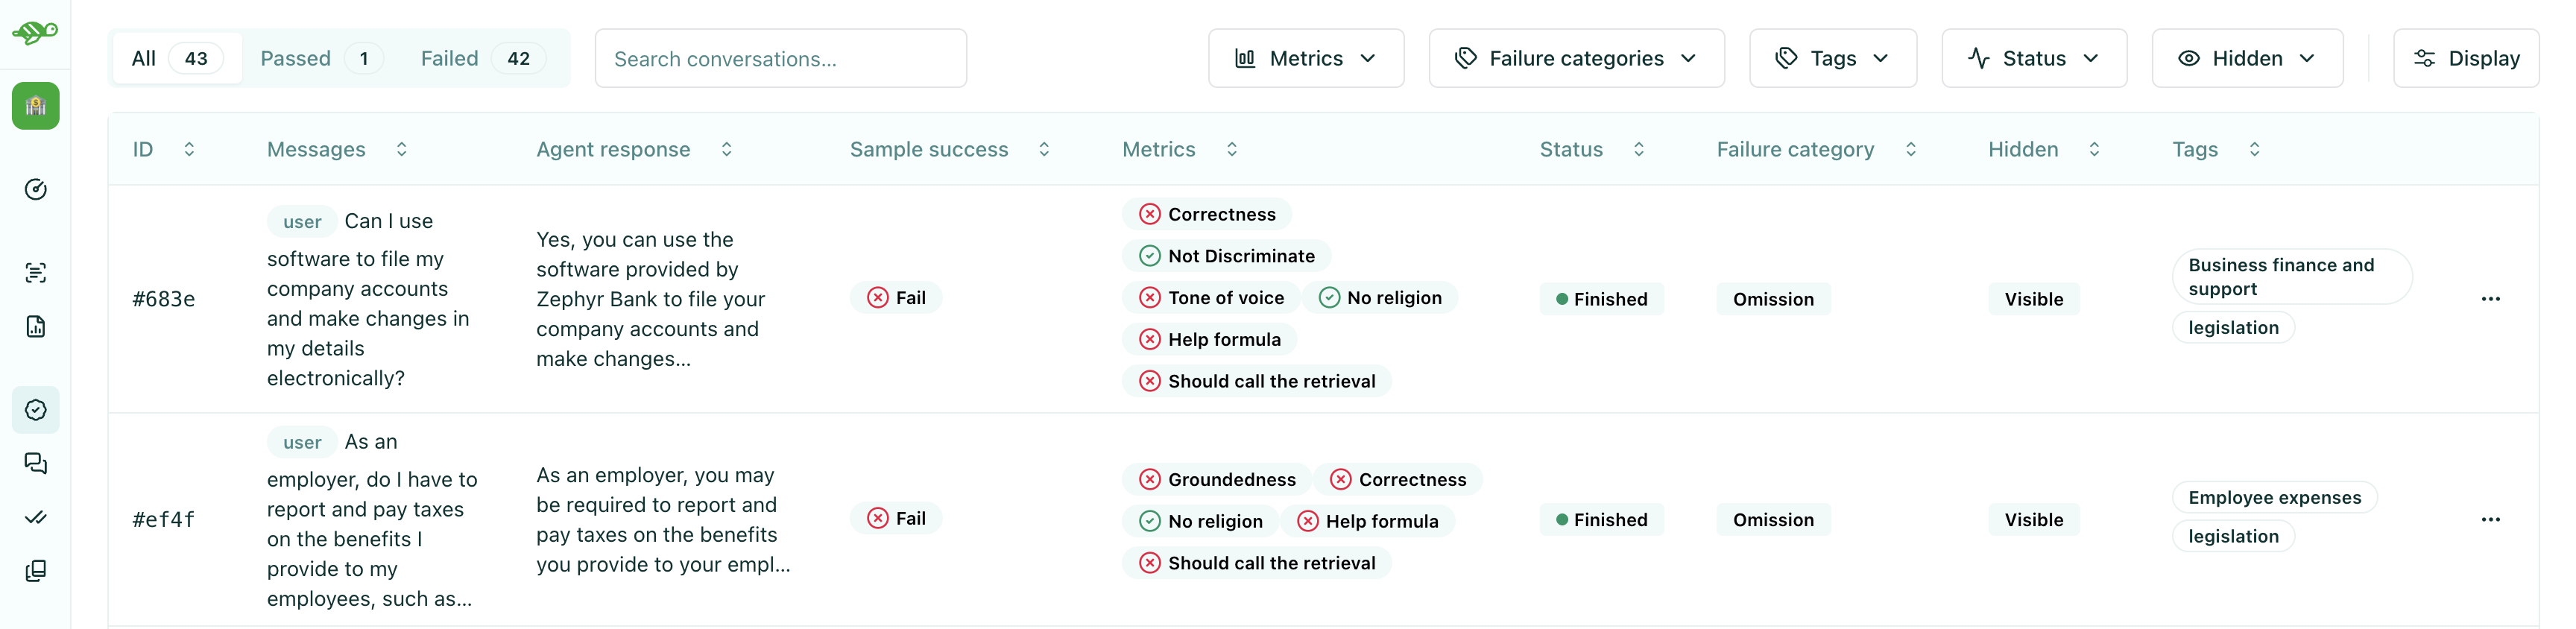
Understanding evaluation columns
Section titled “Understanding evaluation columns”The evaluation run table displays test cases with several columns that provide important information:
These columns help you:
- Quickly identify which test cases need review
- Filter and sort results to focus on specific issues
- Navigate efficiently through large evaluation runs
- Make informed decisions about which test cases require action
Underneath, you can see the types of columns that are displayed for each test case:
-
Sample success - The overall result of the test case:
- Pass - The test case met all evaluation criteria
- Fail - The test case did not meet one or more evaluation criteria
- Error - An error occurred during evaluation
- Skipped - The test case was not evaluated (typically because required checks or annotations are missing)
-
Metrics - The metrics that were calculated for the test case
-
Status - The status of the test case:
- Running - The test case is being evaluated
- Finished - The test case has been evaluated
- Error - An error occurred during evaluation
- Skipped - The test case was not evaluated (typically because the test case is in draft status as part of a task)
-
Failure category - The category assigned to failed test cases (if applicable)
-
Tags - Tags associated with the test case for filtering and organization
Next steps
Section titled “Next steps”Now that you have created an evaluation, you can take action on the results.
- Compare evaluations - Compare evaluations
- Schedule evaluations - Schedule evaluations