Setup agents
In this section, we will walk you through how to setup agents using the Hub interface.
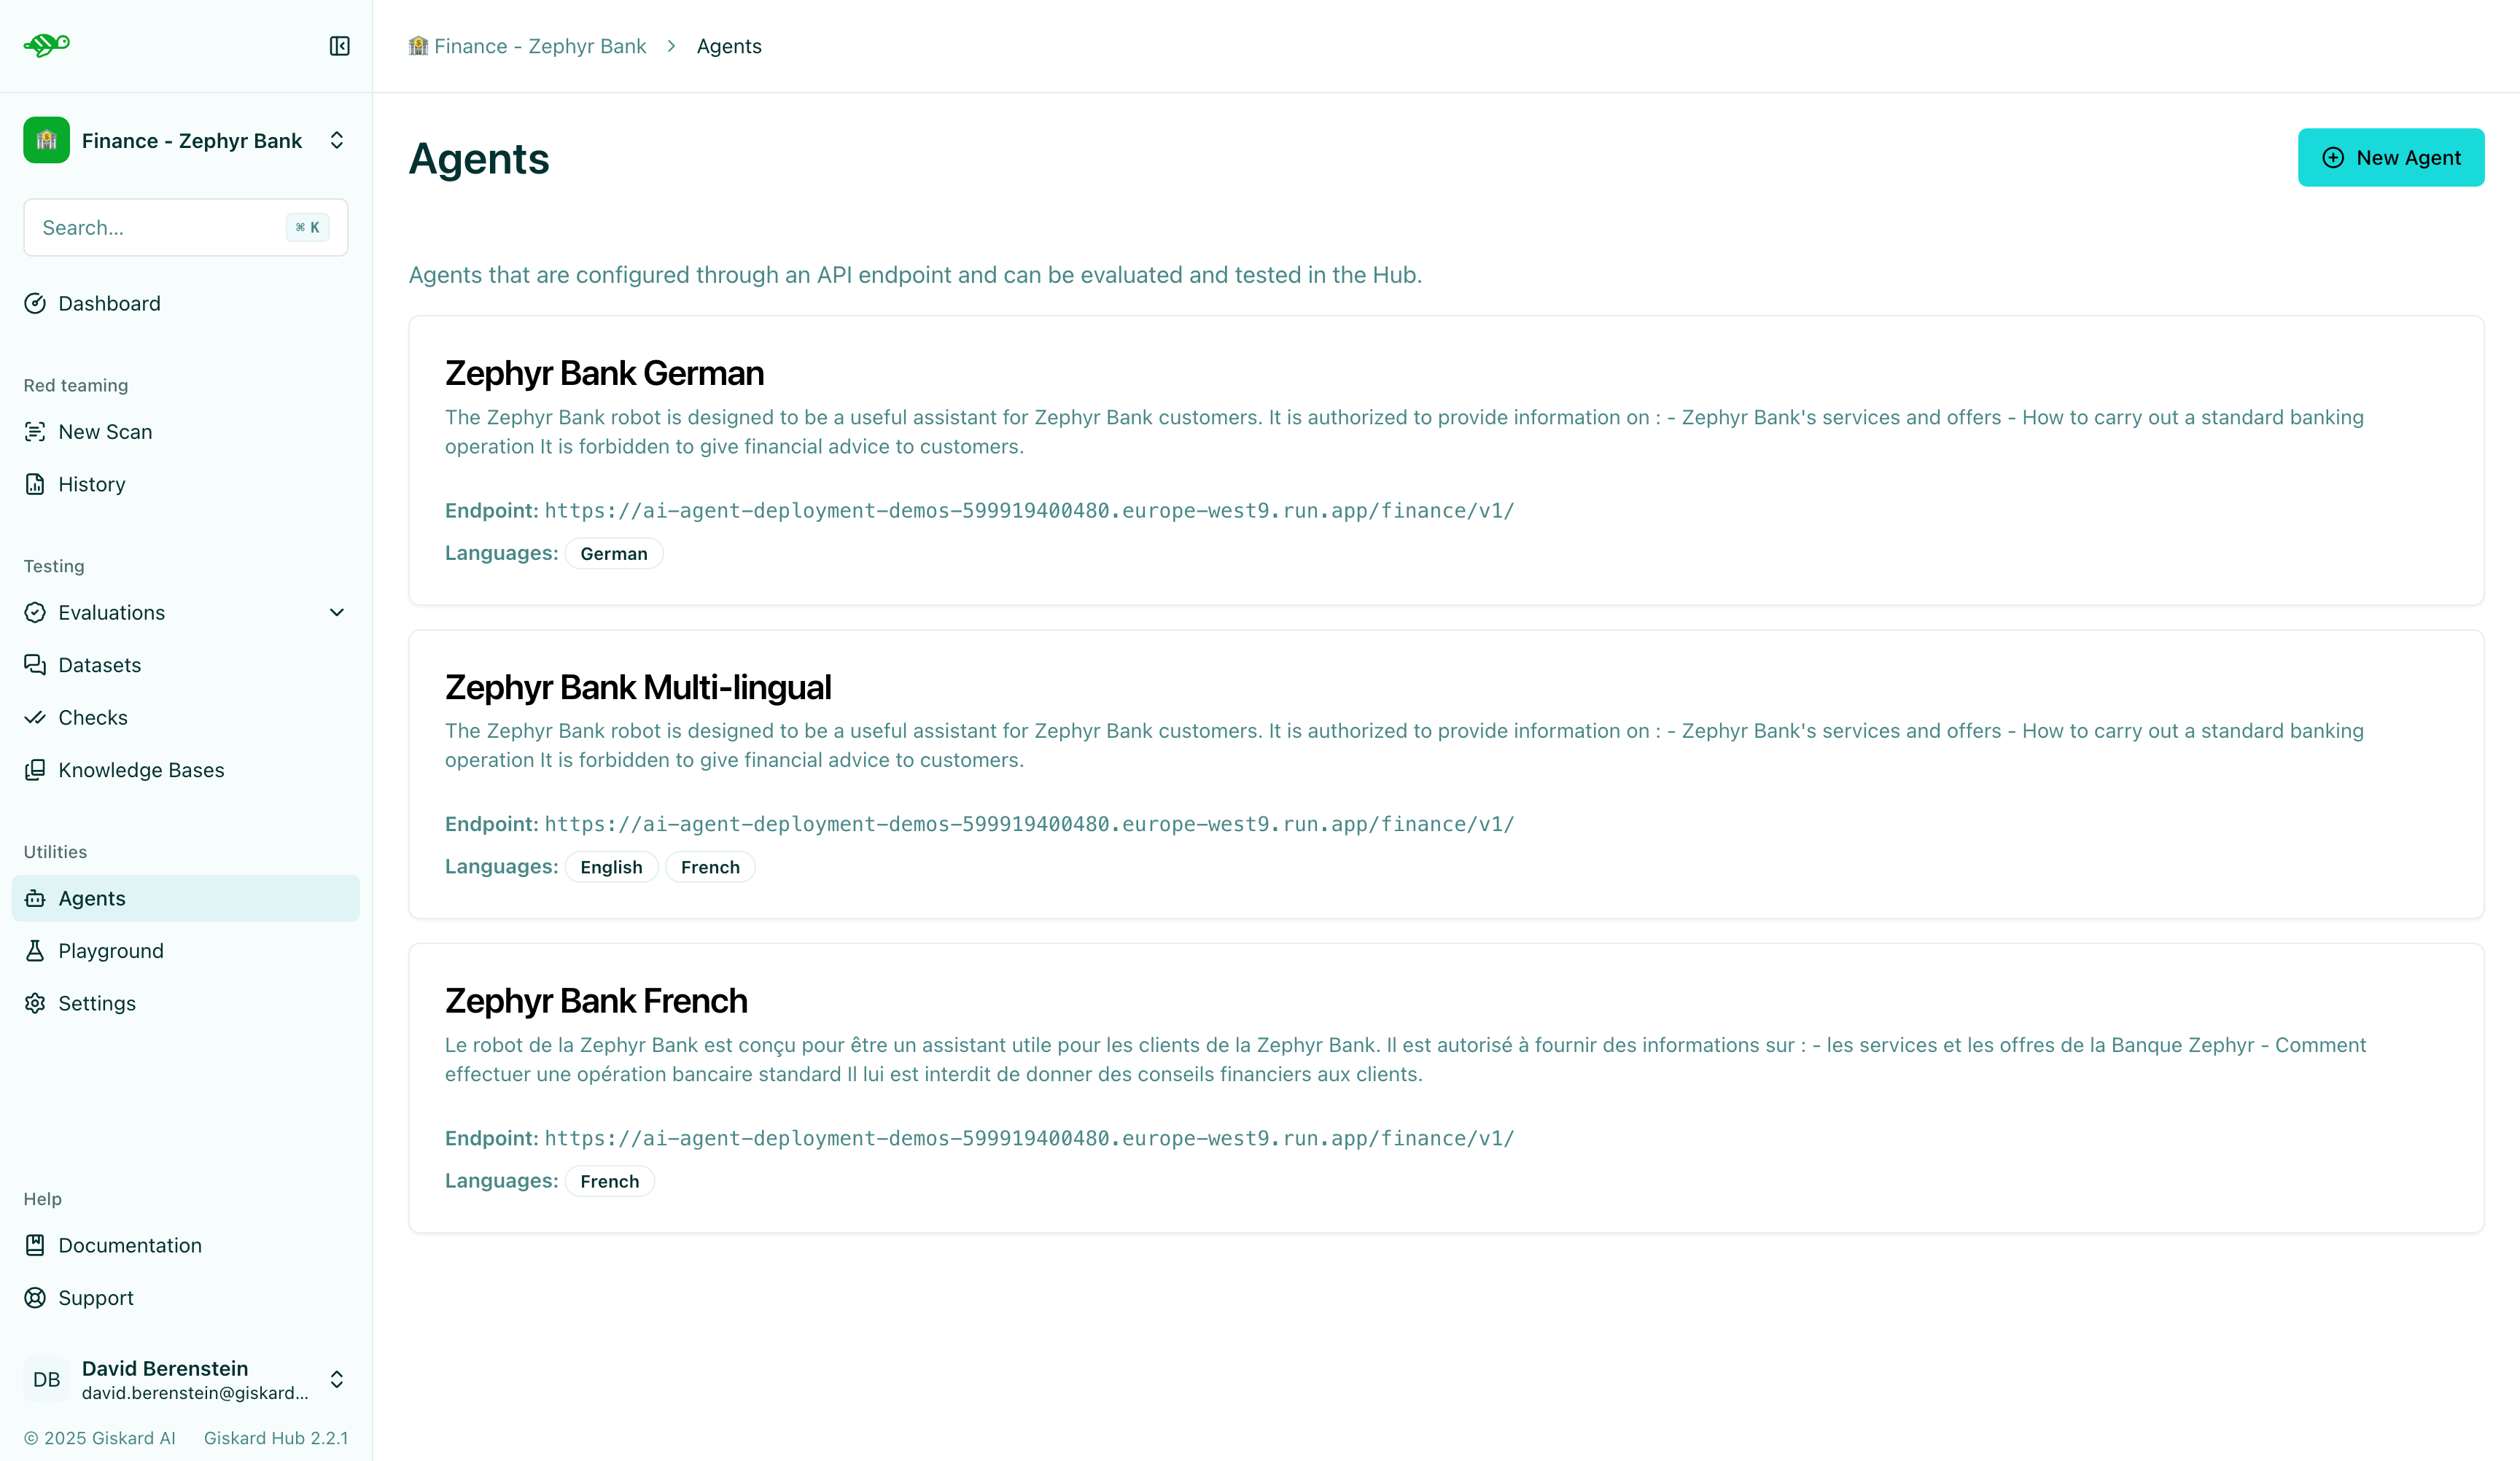
Create a new agent
Section titled “Create a new agent”On the Agents page, click on the “New agent” button.
Agent fields
Section titled “Agent fields”The interface below displays the agent details that need to be filled out.
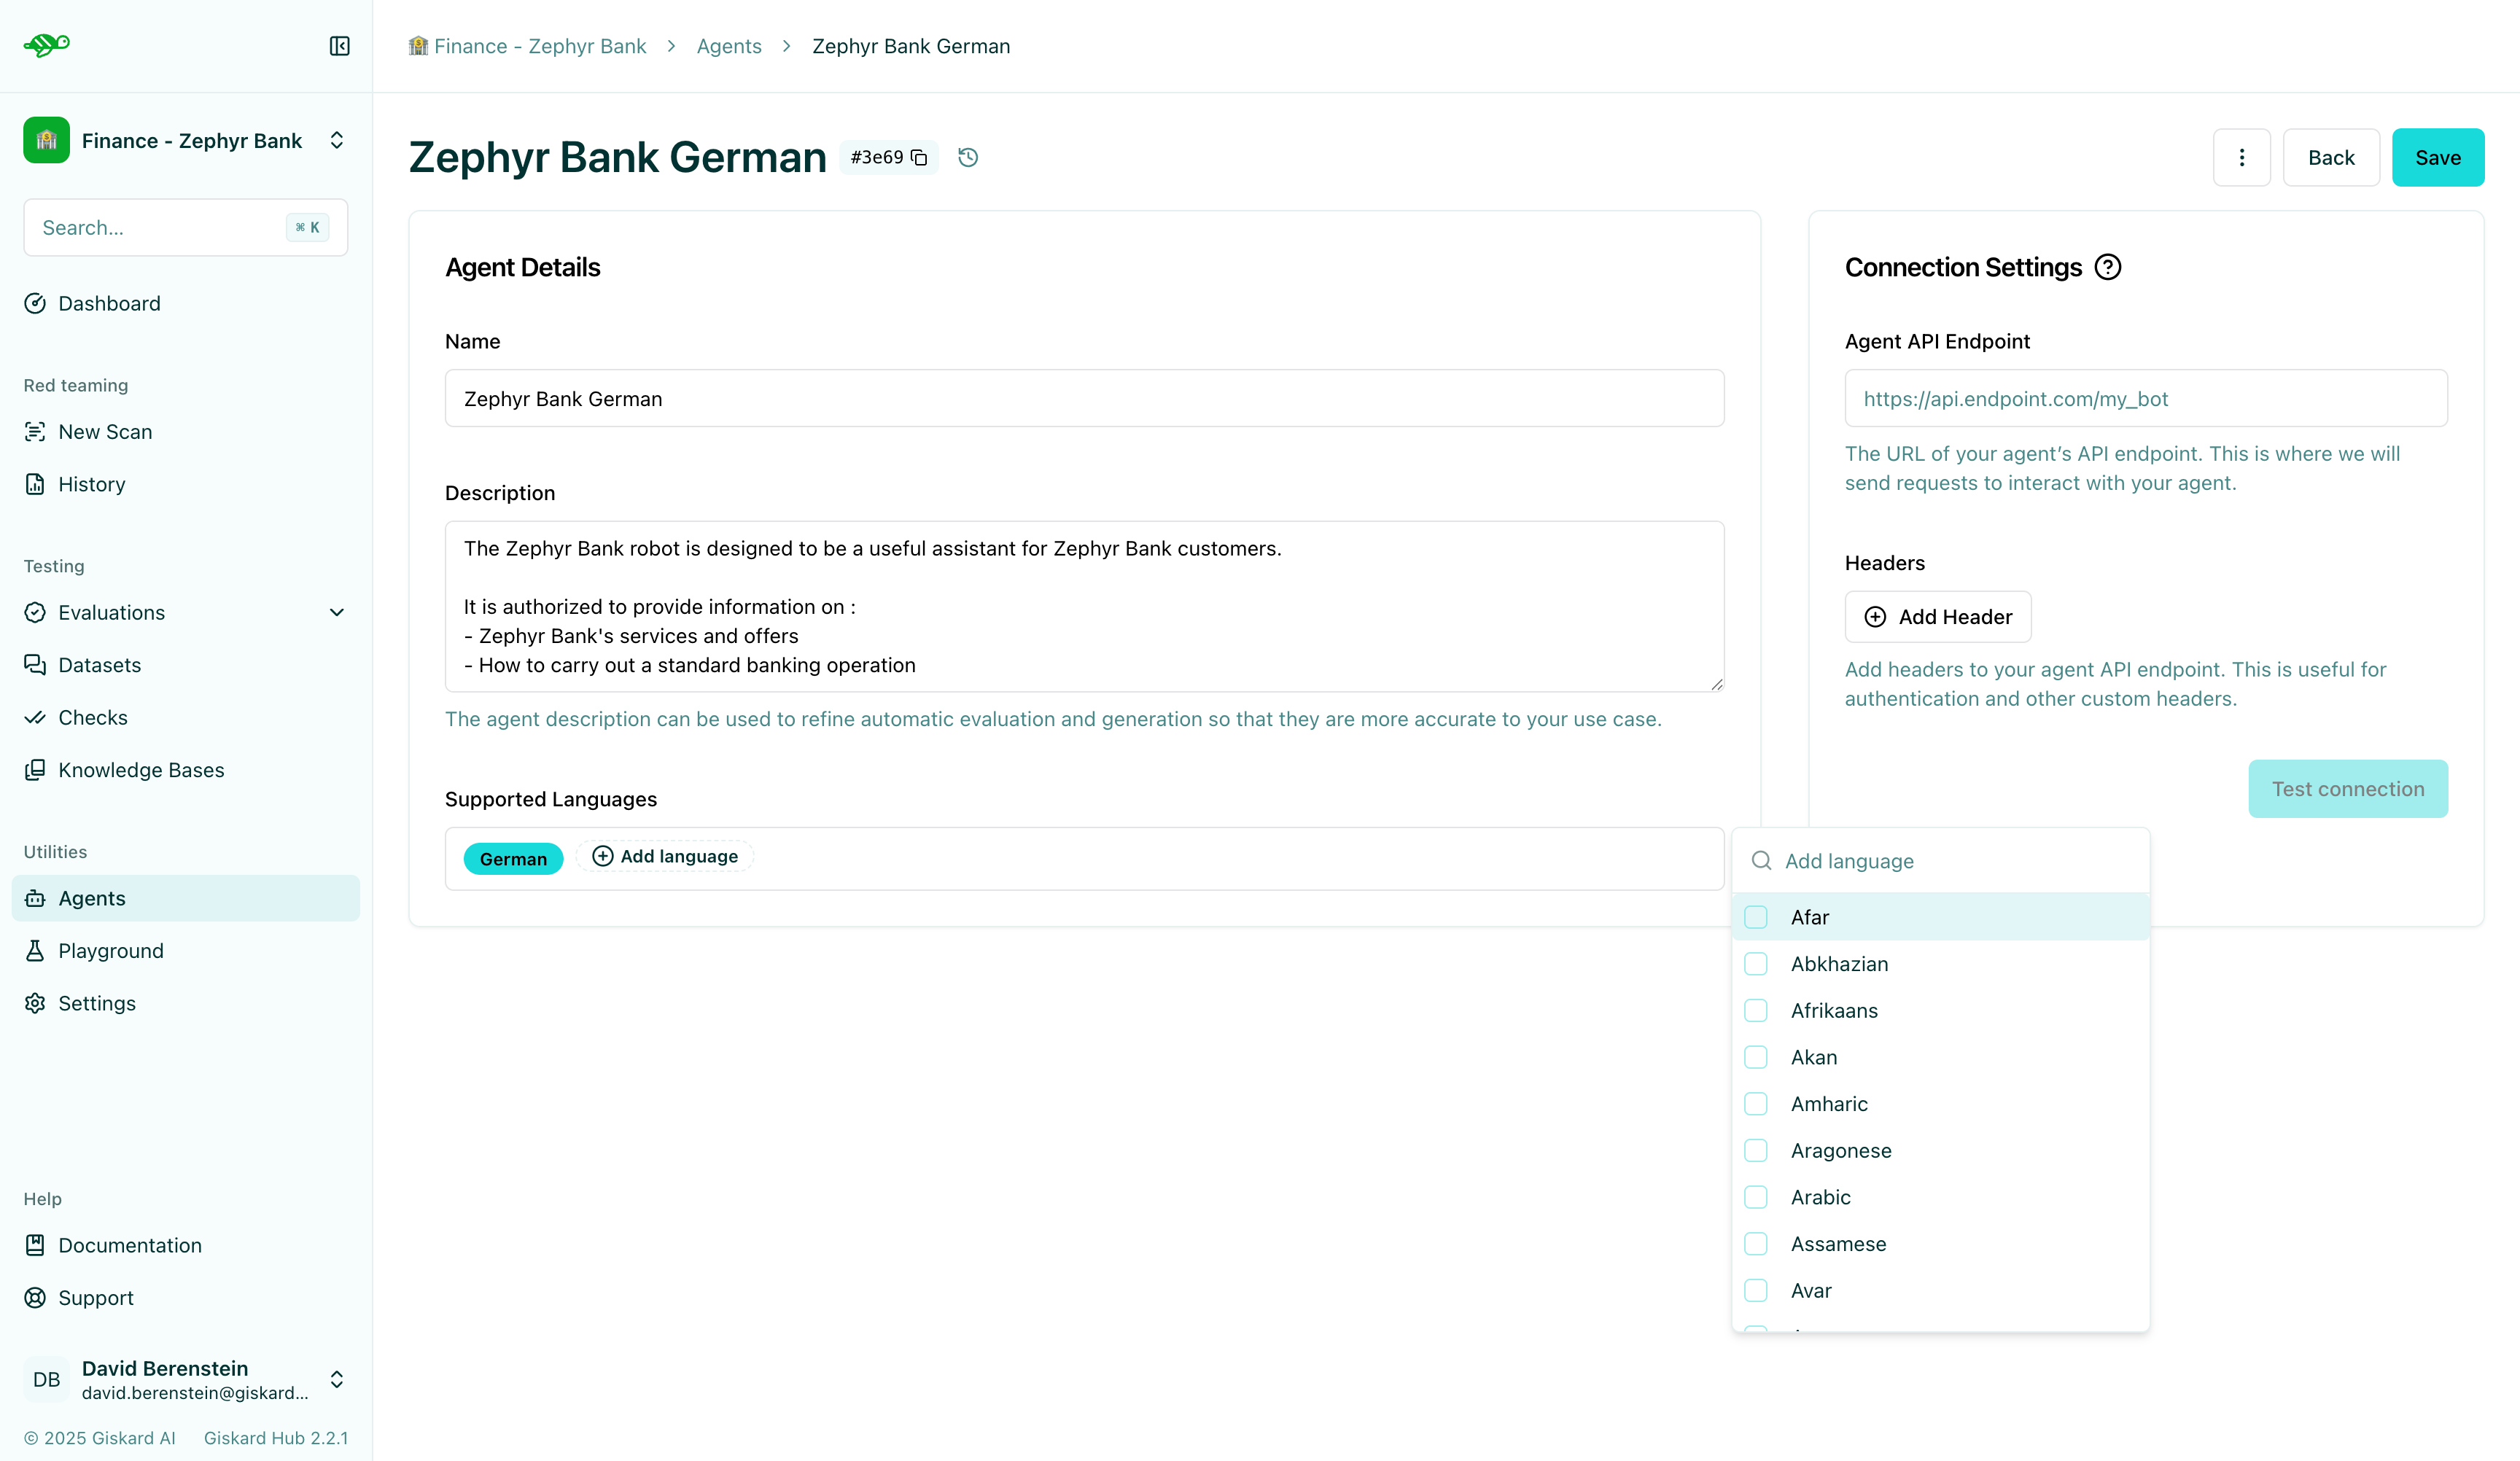
Name: The name of the agent.Description: Used to refine automatic evaluation and generation for better accuracy in your specific use case.Supported Languages: Add the languages your agent can handle. Note that this affects data generation.Connection Settings:Agent API Endpoint: The URL of your agent’s API endpoint. This is where requests are sent to interact with your agent.Headers: These are useful for authentication and other custom headers
Request payload
Section titled “Request payload”The endpoint should expect an object with the following structure:
{ "messages": [ {"role": "user", "content": "Hello!"}, {"role": "assistant", "content": "Hello! How can I help you?"}, {"role": "user", "content": "What color is an orange?"}, ]}Response payload
Section titled “Response payload”The endpoint’s response should have the following structure:
{ "response": {"role": "assistant", "content": "An orange is green"}, "metadata": {"some_key": "whatever value"},}Next steps
Section titled “Next steps”Now that you have created an agent, you can start setting up your knowledge bases and create test cases and datasets.
- Setup knowledge bases - Setup knowledge bases
- Manage users and groups - Manage users and groups
- Create test cases and datasets - Create test cases and datasets
- Launch vulnerability scans - Launch vulnerability scans