🐢Giskard Hub
Leverage Hugging Face (HF) Spaces to easily test & debug your own ML models.
Why Giskard?
Giskard is an open-source testing framework dedicated for AI models, from tabular to LLMs. Giskard is composed of
An open-source Python library containing a vulnerability scan, testing and CI/CD framework for ML models
The Giskard Hub, a server application, containing a collaborative ML Testing dashboard for model debugging (root-cause analysis), model comparison & human feedback collection for ML.
The Giskard Hub is a self-contained application completely hosted on Hugging Face Spaces using Docker. Visit the Giskard documentation to learn about its features.
On this page, you’ll learn to deploy your own Giskard Hub and use it for testing and debugging your ML models.
Try the Giskard Hub on demo models in a single click
If you want to try the Giskard Hub on some demo ML projects (not on your own ML models), navigate to our public demo Space:

Hint
The demo Giskard Space is read-only. To upload your own models, datasets and projects in the Giskard Space, we recommend that you duplicate the Space. More on this in the following sections.
Test & debug your own ML model in the Giskard Hub using HF Spaces
Leverage the Hugging Face (HF) Space to easily test & debug your own ML models. This implies that you deploy a private HF space containing the Giskard Hub and upload your Python objects (such as ML models, test suites, datasets, slicing functions, or transformation functions) to it. To do so, follow these steps:
1. Create a new Space using the Giskard Docker template
Begin by visiting Hugging Face Spaces and click on “Create new Space” as depicted below. Alternatively, navigate directly here to create a new space from the Giskard template.
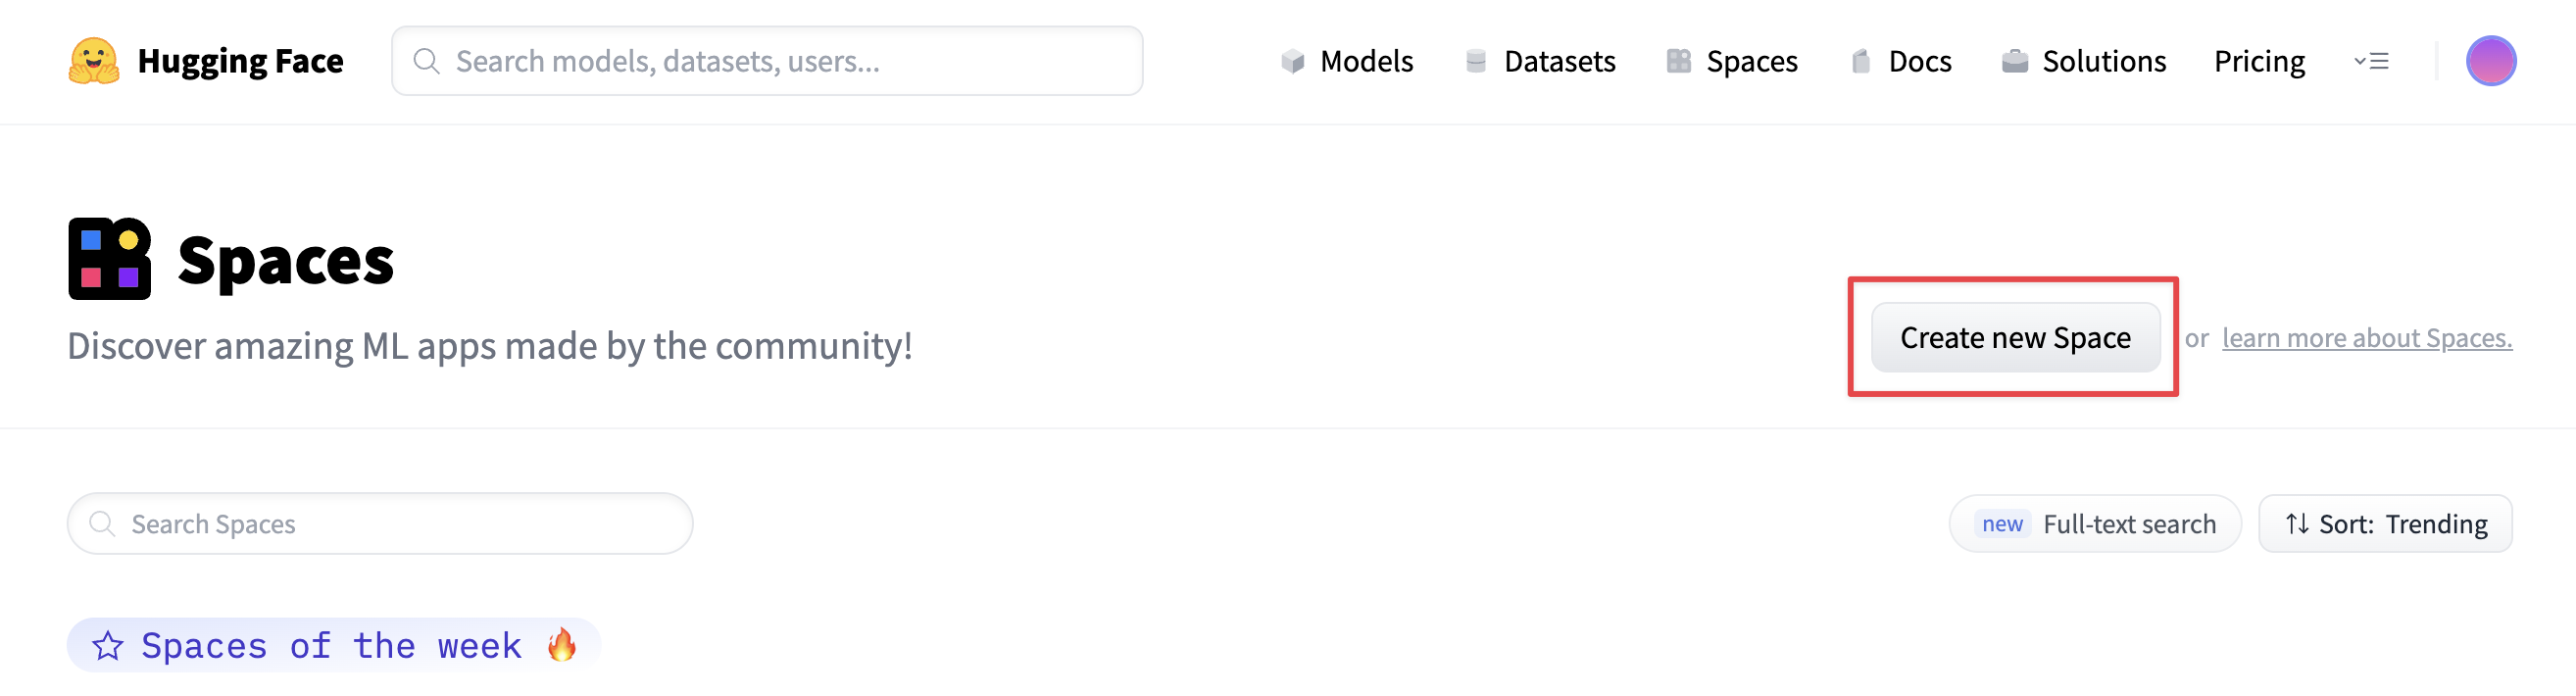
You can then deploy Giskard on Spaces with just a few clicks. You need to define the Owner (your personal account or an organization), the Space name, and the Visibility.
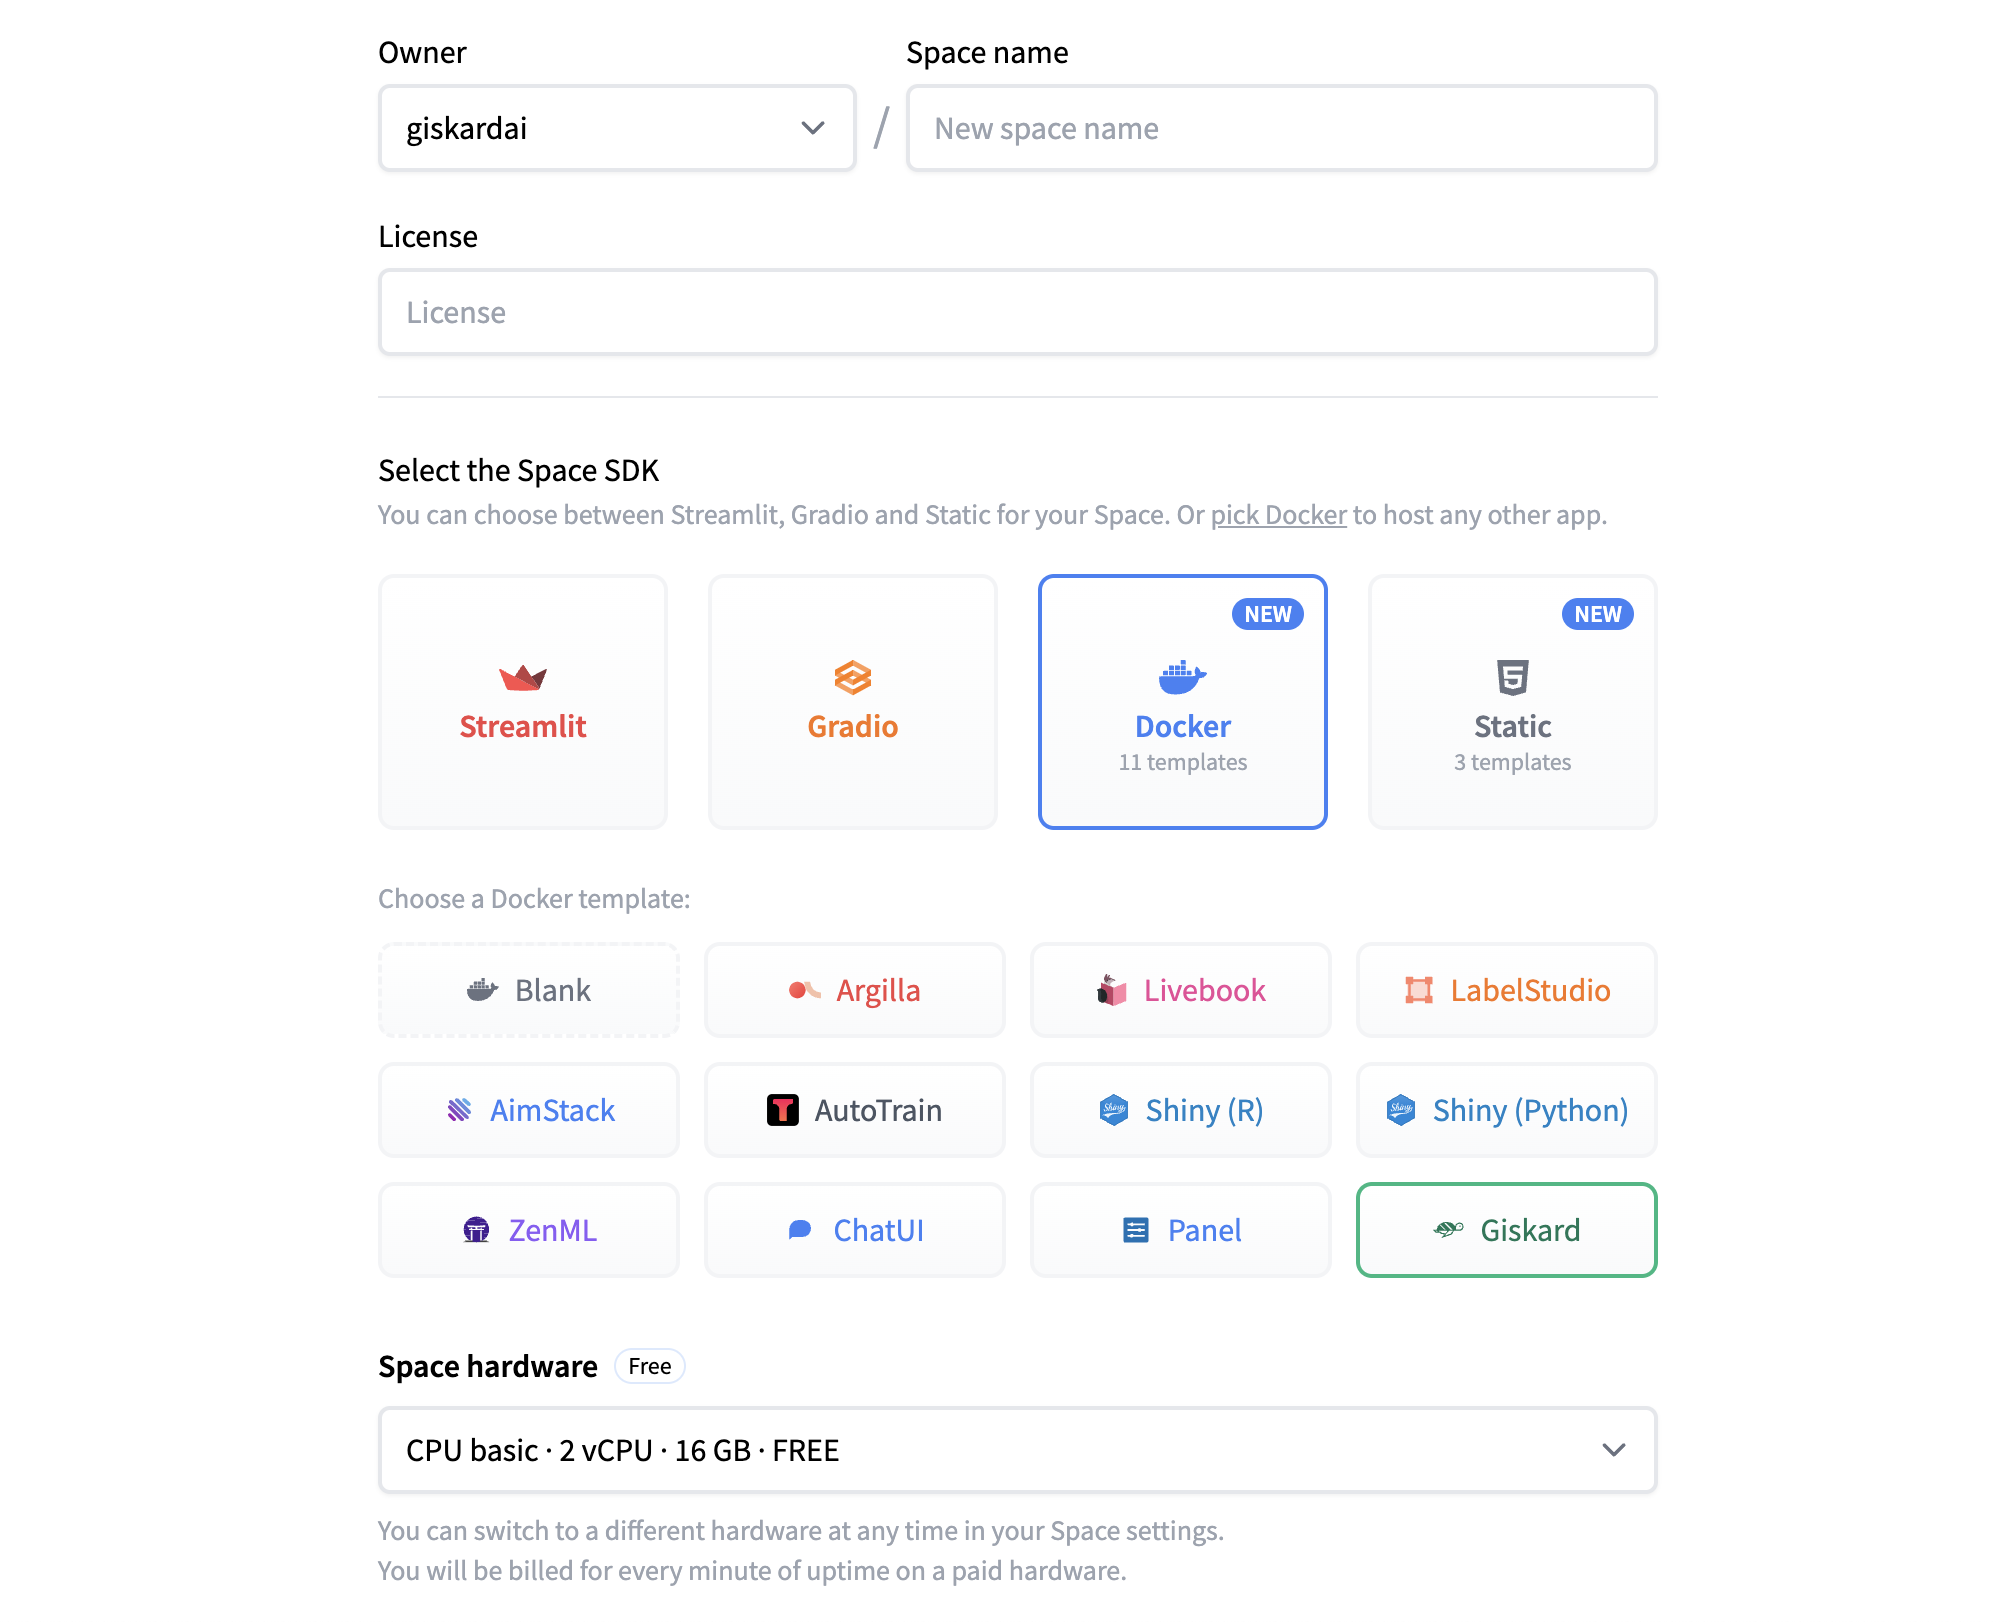
Hint
Owner and visibility: If you don’t want to publicly share your model, set your Space to private and assign the owner as your organization Hardware: We recommend to use paid hardware to get the best out of Giskard’s HF Space. You can also incorporate persistent storage to retain your data even after the Space reboots. With free hardware that lacks persistent storage, any inactivity beyond 48 hours will result in the space being shut down. This will lead to a loss of all data within your Giskard Space.
Once you’re ready, click on “Create Space” to confirm the creation. The build process will take a few minutes.
2. Create a new Giskard project

3. Enter your HF Access token
On your first access on a private HF Space, Giskard needs a HF access token to generate the Giskard Space Token. To do so, follow the instructions in the pop-up that you encounter when creating your first project.
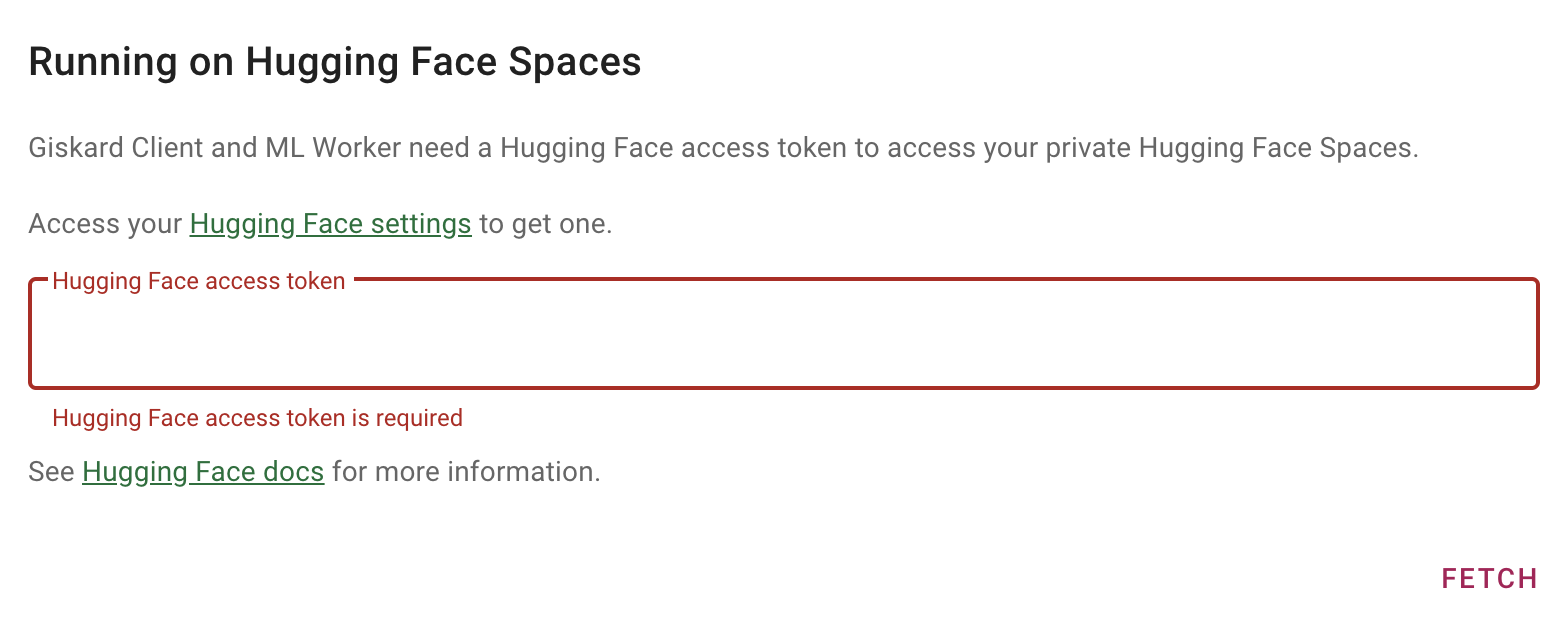
Alternatively, provide your HF access token through the Giskard Settings.
4. Wrap your model and scan it in your Python environment
For detailed guidance on this step, refer to our documentation.
5. Upload your test suite by creating a Giskard Client for your HF Space
You can then upload the test suite generated by the Giskard scan from your Python notebook to your HF Space. Achieve this by initializing a Giskard Client: simply copy the “Create a Giskard Client” snippet from the Giskard Hub settings and run it within your Python notebook.
You are now ready to debug the tests which you’ve just uploaded in the test tab of the Giskard Hub.
Here a comprehensive example of the upload of a test suite to the Giskard Hub in HF Spaces:
from giskard import GiskardClient

url = "<URL of your Giskard hub Space>"
api_key = "<Your Giskard API key>"
hf_token = "<Your Giskard Space token>"

# Create a giskard client to communicate with Giskard
client = GiskardClient(url, api_key, hf_token)

client.upload(...)
Upgrade your Giskard Hub in HuggingFace Spaces
When installing the Hub in Hugging Face Spaces, the latest version will be fetched. The version will always remain the same unless you manually run an upgrade. Upgrades are recommended to get the latest features and bug fixes deployed by Giskard.
To do so, you can open the Dockerfile in your repository. The first line should be similar to this:
FROM docker.io/giskardai/giskard:<version>
Change <version> to the latest version and save the file. After the build and rebooting of the Space, you should be able to enjoy the latest features in the Giskard Hub.
Feedback and support
If you have suggestions or need specialized support, please join us on the Giskard Discord community or reach out on Giskard’s GitHub repository.